
Matheus Fernandes
Monday, November 8, 2021 | 8 minutes
Simple SDL UI
Simple UI Project
Some time ago I started to revisit the C++ language. I wanted to update my self with the language and get familiar again with it’s features. To accomplish this I find more interesting to build a small project. I picked the SDL framework and a simple UI system to design and implement.
Features
I wanted it to function similar to the anchor system from Unity3D.

Where you can define the element’s pivot and the anchors on its parent. So you could position it in relation to the parent; and it would be ‘anchored’ with that point. Or you could set a portion of area and it would scale as well.
At this point I wouldn’t care about rotation or scale. But I should have at least one button, render images, support 9slice, image map and some basic support to draw rectangles in the canvas. I set the initial goal as:
- Basic element hierarchy. Where I could set an element as child of another and it should respect it’s parent positioning and re-layout
- Basic anchor system. Should be similar to Unity’s system. Being able to define the anchor and as the element is resized or moved it should follow. For example: Define the anchor to be the center of the parent. The element should stay at the center no matter how we move or resize the parent. Or define the anchor as min left and max right. As the parent expand it’s width, the child should expand as well, respecting it’s constrains.
- Draw basic rectangle shape. This should prove useful for debugging.
- Load and draw images. Should be able to load texture and avoid loading the same image twice and make cache to reuse the images that were already loaded. Optionally, for this first version I could add support for blending and tinting.
- Load image map. This should be the same as sprite map. A set of images grouped together. In this case, I would use a json file to read the properties and load the images within. The Map is generated using the texture packer.
- 9Slice images. Add support to use 9 slices images.
- Buttons. Support to some basic button - supporting mouse over, mouse down and disabled states. It should use images/9slices and could use tint if possible.
Project
Basic element Hierarchy and Anchor System
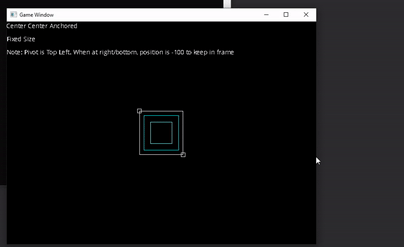
I started thinking about the basic system. Added the concept of UI application, layer, widget and Transform. The transform was necessary to calculate the local and global position correctly. The widget would be the basic element to construct all UI elements. It should have the transform, the size and the pivot point, also the basics to the anchor system. I added a limited support to rectangles as well, so I could experiment with the anchors. At the end I had a small sample of UI ready to position, add child and anchor to it’s parent.
For this initial example I setup a rectangle (out white line) with four children with constrains:
- The first inner blue rectangle should follow the parent position and size with a small margin.
- The center square, it should be fixed at the center and with fixed size
- A square at top left point
- A square at bottom right point
The following GIFs shows this first step progress. As we change the window size the main rectangle should follow it’s constrains in relation to it. The first GIF shows it centered: first without changing size, but then with a size constraint to the right it starts to change size, keeping the left side at the center of window and the right side goes to the right and follow the edge of window. The second GIF shows it covering the whole window and maintaining it’s children properly aligned. The third and last GIF shows it anchored to the right bottom of window.


After that I explore a little more with the rectangles, adding a Color structure (that could load color from HTML string (#FFFFFF)), and an option to use Fill/Line colors and some basic blending mode to use the alpha channel.
Image, Image Map and 9Slice
Next step would be to load some images into the screen. I used the SDL_Image to be able to load PNG images. To save memory and increase performance I shouldn’t load the same texture more than once. I created a simple factory that keeps track of the textures that were already loaded and create the Image from that texture. The image extends the Widget, so the anchoring and positioning were ready. A nice surprise was that from the way SDL works, the widgets width and height actually changed the width and height of the image when rendering. Although it was not a goal for this project, I confirmed that the anchor system kept working just fine.
From the Image implementation I worked towards the 9Slice feature. It wasn’t that hard to implement. 9Slice is the idea that we could re-scale an image with minimum distortion by keeping track of key parts of the image and reconstructing it when resized. Basically we dived the image into 9 pieces to avoid distorting the corners, preserving the original aspect. This has the advantage that some big elements could use small images with this technique - like windows, background elements, buttons, etc.
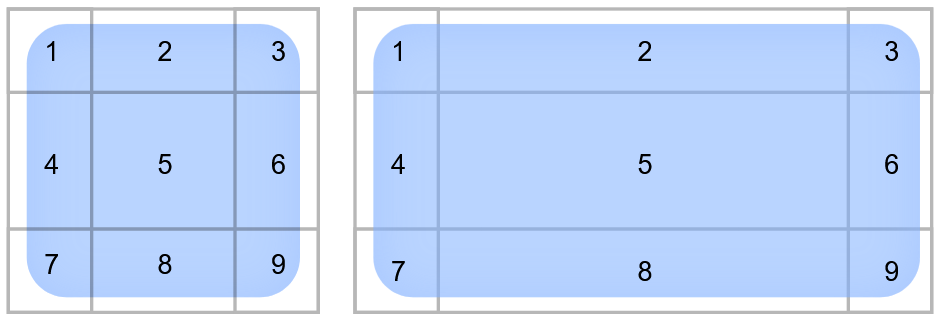
In my implementation the object should keep track of the slices offsets - how much from top, left, right and bottom we should offset to generate the slice. Then just draw from that Rect instead of the original one - the original would be the entire image rect, the calculated would be one of the nine slices in the image. From the Widget we get the height and width intended for the image and calculate where the corners goes, and how much we should fill with the other five parts. Then just draw the other parts to fill the missing part.
From that point we could load images and 9slice images, but only from single files.
![]()
However we know that games love to use texture maps (otherwise known as sprite/texture atlas) to help with performance and memory management.
So, of course, I had to support it. I used the texture packer to pack the images into a single image with a json file description. From there it was simple reading the json using JSON for modern C++ and creating the Images using the original Atlas Texture as reference. I searched for a free UI that I could use and found this one in Freepik, Designed by macrovector / Freepik - real nice one. I edited to get the UI elements and generated this atlas.
Then I updated the Sample, using the 9Slice and some image within it.
Event system and Buttons
With the basics and images ready, it was time to add some buttons and interactivity. I used the SDL event system for polling the events and propagate through out the layers. At this initial system I just propagate the events to all widget that are intractable and visible - I realize that it might be a good idea, for performance reasons, to have a Spatial Partitioning to detect the mouse over events etc. However to this simple project I did not use it or any other optimization algorithms.
For the mouse, the layer can scan the available widgets and check if the mouse point is inside the widget bounding box. A bounding box int the widget is the smallest box that can wrap the widget and all its children. If the mouse pointer is inside that box, the layer passes the event to the widget, that tests if the event is inside itself (the widget box) and handles the event or passes it to the next one and so on. I had to add a way to, optionally, prevent the event propagation once the event has been handled with. The widget controls its states (over, down, up, etc). I added some virtual methods to focus only the messages itself when extending the widget (OnMouseOver, OnMouseUp, etc).
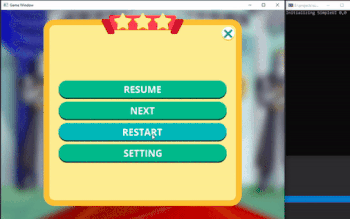
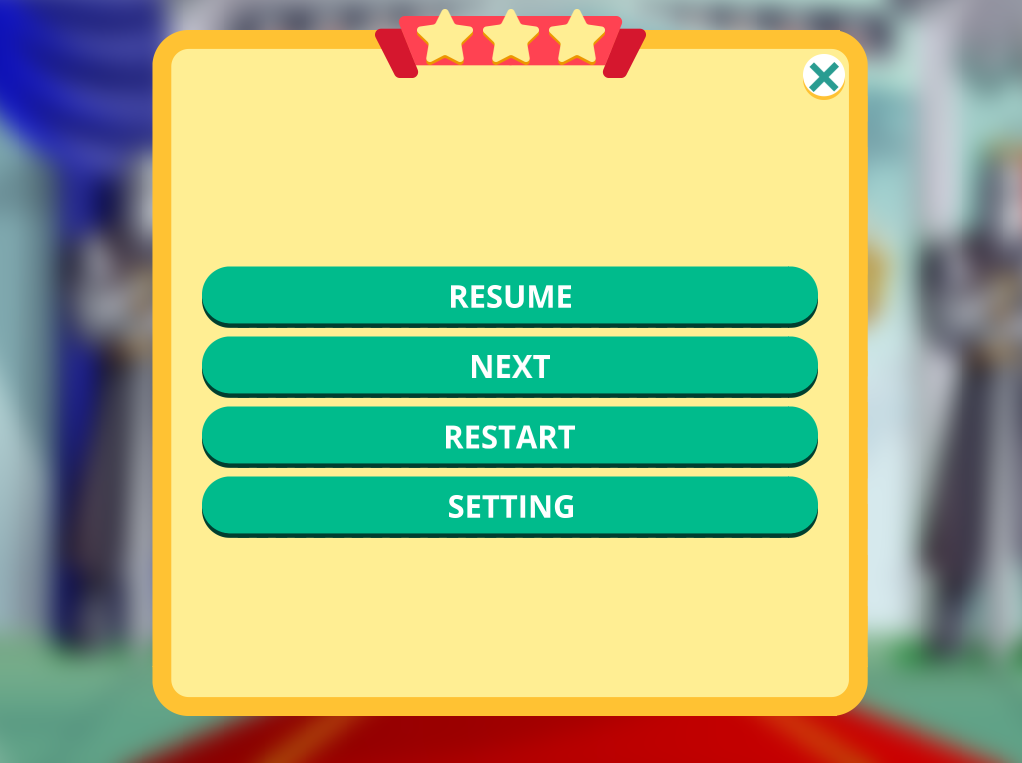
For the button, I first implemented the callback. It is a simple vector of functions, and when a click is detected, we go through the functions calling them. And them added a way to represent the button with images. I added a small factory to create the buttons. The button could use up to four images to represent its sates (up, over, down, disabled) or update some of the images states - like Tinting the image.
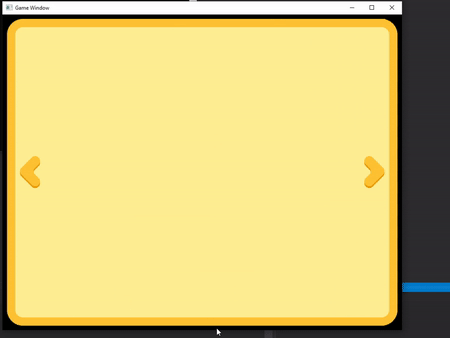
At the end, I build a small “scene” with a background image blurred in Photoshop (The image is from Ouro vetor criado por upklyak / Freepik). with a window and some buttons working.
Next
Some things that could be done next in this project:
- Rotation and Scale
- Components like Scrollable Lists, Toggles, Toggle Group, Alignment (like grids and vertical layout), Menu, Context Menu, Drop down menu, etc.
- Text
- Effects with textures
- Serialization
- Improvements, Performance and memory management and API design
- SDL API wrap to make it less dependent to the framework
- Get inspiration from other GUI API to further improve the application system design
Conclusion
I have learned a lot with this project in the past week. The main goal, that was to get familiarized with C++ again, was a success. I had a lot of fun this little project and with the process I have learned a good deal of SDL and UI programming design. There is a lot that I could improve or do differently, but for a first try I think it is good enough.
As always, I will keep learning with this and other personal projects.
Thank you =)
This article was also published at linkedin